En:Milestone and To-Do List: Unterschied zwischen den Versionen
Keine Bearbeitungszusammenfassung |
|||
| Zeile 55: | Zeile 55: | ||
When a task is completed, you slide the bar to the right <i class="far fa-toggle-on navFont ny fa-2x" style="color:#029203"></i>. The task is now marked as completed. | When a task is completed, you slide the bar to the right <i class="far fa-toggle-on navFont ny fa-2x" style="color:#029203"></i>. The task is now marked as completed. | ||
==Overview of Tasks== | == Overview of Tasks == | ||
You will receive an overview of your tasks by selecting the '''category''', '''milestone''', '''employee''', and '''time frame'''. Once you have selected the criteria, the corresponding tasks will be displayed. | You will receive an overview of your tasks by selecting the '''category''', '''milestone''', '''employee''', and '''time frame'''. Once you have selected the criteria, the corresponding tasks will be displayed. | ||
[[Datei:Aufgaben Übersicht.png|miniatur|Overview of Tasks]] | [[Datei:Aufgaben Übersicht.png|miniatur|Overview of Tasks]] | ||
Version vom 24. September 2024, 13:55 Uhr
Using the Milestones and Tasks features in the program, you can gain an overview of your tasks. Here, tasks can be sorted by importance and assigned to specific team members. For example, a harvest festival can be set up as a milestone, and the various tasks that need to be completed can be grouped under this milestone.
| So findest Du diese Seiten: |

|
| Meilensteine & Aufgaben |
Creating and Editing Milestones
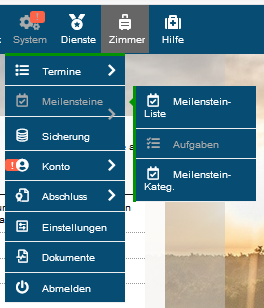
System - Milestones - Milestone-List
To create a new milestone, open the icon - System - then click on Tasks and follow it by selecting Milestones. Here, you will see a list of all milestones.
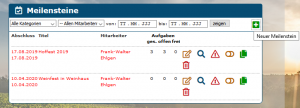
On the Milestones page, click on the icon to create a new milestone. A new window will open where you can set the Title, Time Frame, Responsible Employee, Priority, and Category. If you wish, you can also add a comment or instruction regarding the associated milestone in the Description field.
You can set up milestone categories, such as Events or Sales Tasks, to directly assign them to specific tasks.
To do this, click on System - Tasks - MS Categories, and then click on the green plus icon - .
Creating and Editing Tasks
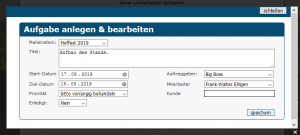
After you have created the milestones, you can assign tasks to each of them. Go to System - Tasks - Task List, and create a task by clicking the green plus icon - for your milestone. A window titled Create & Edit Tasks will open. In the first field labeled Milestone, you can assign the task to the respective milestone.
Creating Tasks
System - Tasks - Task-List
As with the milestones, navigate to the Task List by going through the System icon - and then selecting Tasks. Click on the green plus icon to create a new task. A new window will open, allowing you to assign a milestone to the task, give it a title, and set the time frame, priority, and responsible employees.
After you have created milestones, they will be displayed at the top left next to the Category field when you create tasks.
Editing Tasks
Click on Task List and go to the field . Additional actions will open up that you can perform on the task, including Edit Task using this icon . The task can be edited at any time, such as changing the time frames or assigning the task to a different employee.
Other available actions include moving the task to another milestone, deleting the entry, and marking the task as completed you will find under this icon .
Marking Tasks as Completed
When a task is completed, you slide the bar to the right . The task is now marked as completed.
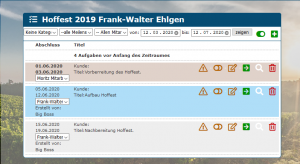
Overview of Tasks
You will receive an overview of your tasks by selecting the category, milestone, employee, and time frame. Once you have selected the criteria, the corresponding tasks will be displayed.


