En:Customer groups and selections: Unterschied zwischen den Versionen
| Zeile 37: | Zeile 37: | ||
You can also add customers to a group via the corresponding index card (customer file/system), create a completely new customer group as part of a [[selection]] or add an entire selection of customers to an existing group. | You can also add customers to a group via the corresponding index card (customer file/system), create a completely new customer group as part of a [[selection]] or add an entire selection of customers to an existing group. | ||
Click on the delete icon, <i title= | Click on the delete icon, <i title="Liste löschen" class="far fa-trash-alt navFont nr fa-2x" style="color:#C60005" ></i> to remove the customer from the customer group again. | ||
Version vom 8. Oktober 2024, 08:25 Uhr
| So findest Du diese Seite: |
| Gruppen |
Benefits of customer groups
Customer groups help you to sort and group customers. This may be of interest to you if, for example, you want to address letters to specific customer groups or carry out statistical evaluations. Compared to the selection, the customer groups are static entities, as explicit and manual' customers are added or removed from the group.
Create a customer group
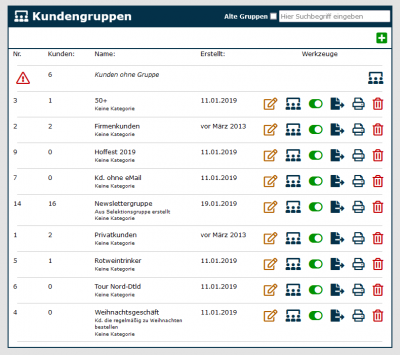
overview customer groups
To get to the customer groups select: Customer - Groups - Customer groups. There you will see a list of the customer groups you have created.
Here you can edit the customer groups, view the members, export any group or delete it. You can find out about the function of the symbols from the Symbolliste or by hovering over the symbols with the mouse. You can also filter by “All groups”, “Active groups” and “Old groups” at the top right.
create a new customer group
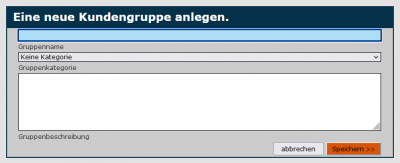
To create a new customer group select: Customer - Groups - Customer groups. You will get to the overview on the right. Select a group name here (under “Name”) and an optional note (under “Description”). If you create different categories under Customer - Groups - Categories, you can now also assign them. Then click on “Create”. The new group now will appear in the group list.
Customers can be added to a newly created customer group quickly and easily. After you have created the new group, the program jumps back to the group overview. You can now see which members are in the group by clicking on the group members icon ![]()
To add new customers, you must go to this overview. You can then add a customer by searching for keywords such as name in the customer search field. You will then receive a list of hits with a green arrow next to each hit. If you click on this arrow, the customer will be added to the group.
You can also add customers to a group via the corresponding index card (customer file/system), create a completely new customer group as part of a selection or add an entire selection of customers to an existing group.
Click on the delete icon, to remove the customer from the customer group again.

